Tuesday, March 22, 2011

Chinese Steamed Fish


Everyone in my family can cook. My sister has a sweet tooth and loves to bake coconut cakes, passion fruit custards, and silky meringues.  My mother owned a catering business for years serving spinach turnovers and grapefruit avocado salads, yet her best dish was always her home-cooked mashed potatoes full of sour cream and hearty potato skins.  My brother loves to host a party, preparing an abundance of dishes including his famous deviled eggs.  My father loves soul food and barbecue, but when he cooks he tends to create refined dishes like steamed mussels in lemongrass broth.  I was a "late cooker," as there were already too many cooks in the kitchen at my house growing up. The first time I ever baked was after I gave up wheat, sugar, and dairy as an adult.  Since then, I have finally made my way into my "family's kitchen" as a chef.  When my father and sister came to visit, our father planned a delicious Chinese feast that we all cooked together.  We steamed snapper with black beans, sauteed watercress and enoki mushrooms, stewed some melon soup, and picked up some roast duck and pork in Chinatown.  Here is the recipe for the snapper and sauteed vegetables.  Look in your local Asian market for these ingredients.


Ingredients
  • 1-2 fillets of snapper
  • 1 small bunch of scallions, sliced
  • 1 large chunk of ginger, minced or grated
  • 2 cloves of garlic, minced
  • 1/2 cup of salted black beans
  • 1 cup of vegetable broth
  • 1 bunch of fresh watercress
  • 1 bunch of enoki mushrooms
  • sesame oil
Directions
  1. In a pan, simmer the vegetable broth with the salted black beans, and about half of the scallions, ginger, and garlic.  Heat until beans are soft and the flavors are integrated.
  2. In a steamer, steam the fish with the rest of the scallions, ginger and garlic for about 10 minutes until cooked through.
  3. In a saute pan, saute the mushrooms in a little sesame oil over medium-high heat.
  4. When the mushrooms are almost cooked through add the watercress, and a splash of water or vegetable broth and cook for another minute.
  5. To serve, pour the black bean broth over the cooked fish.  Serve with the side of vegetables and some rice.
 

Monday, March 7, 2011

Strange Fruit

 
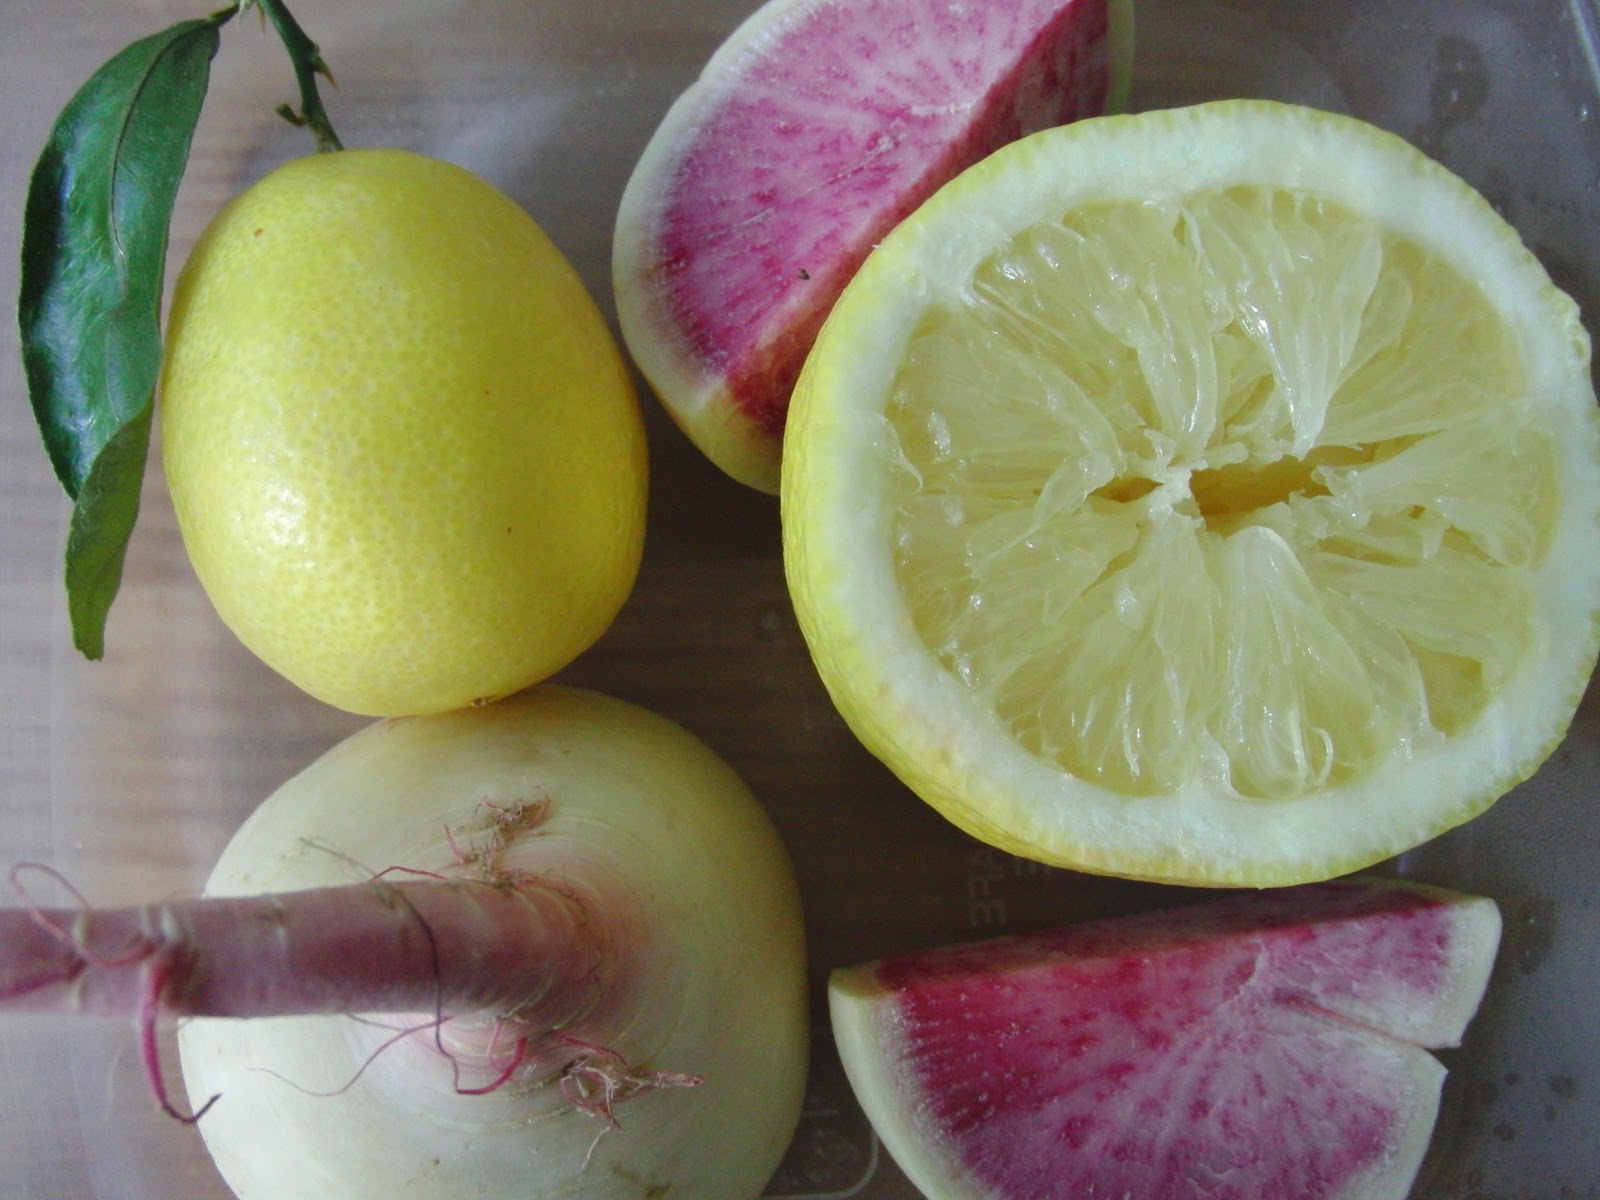
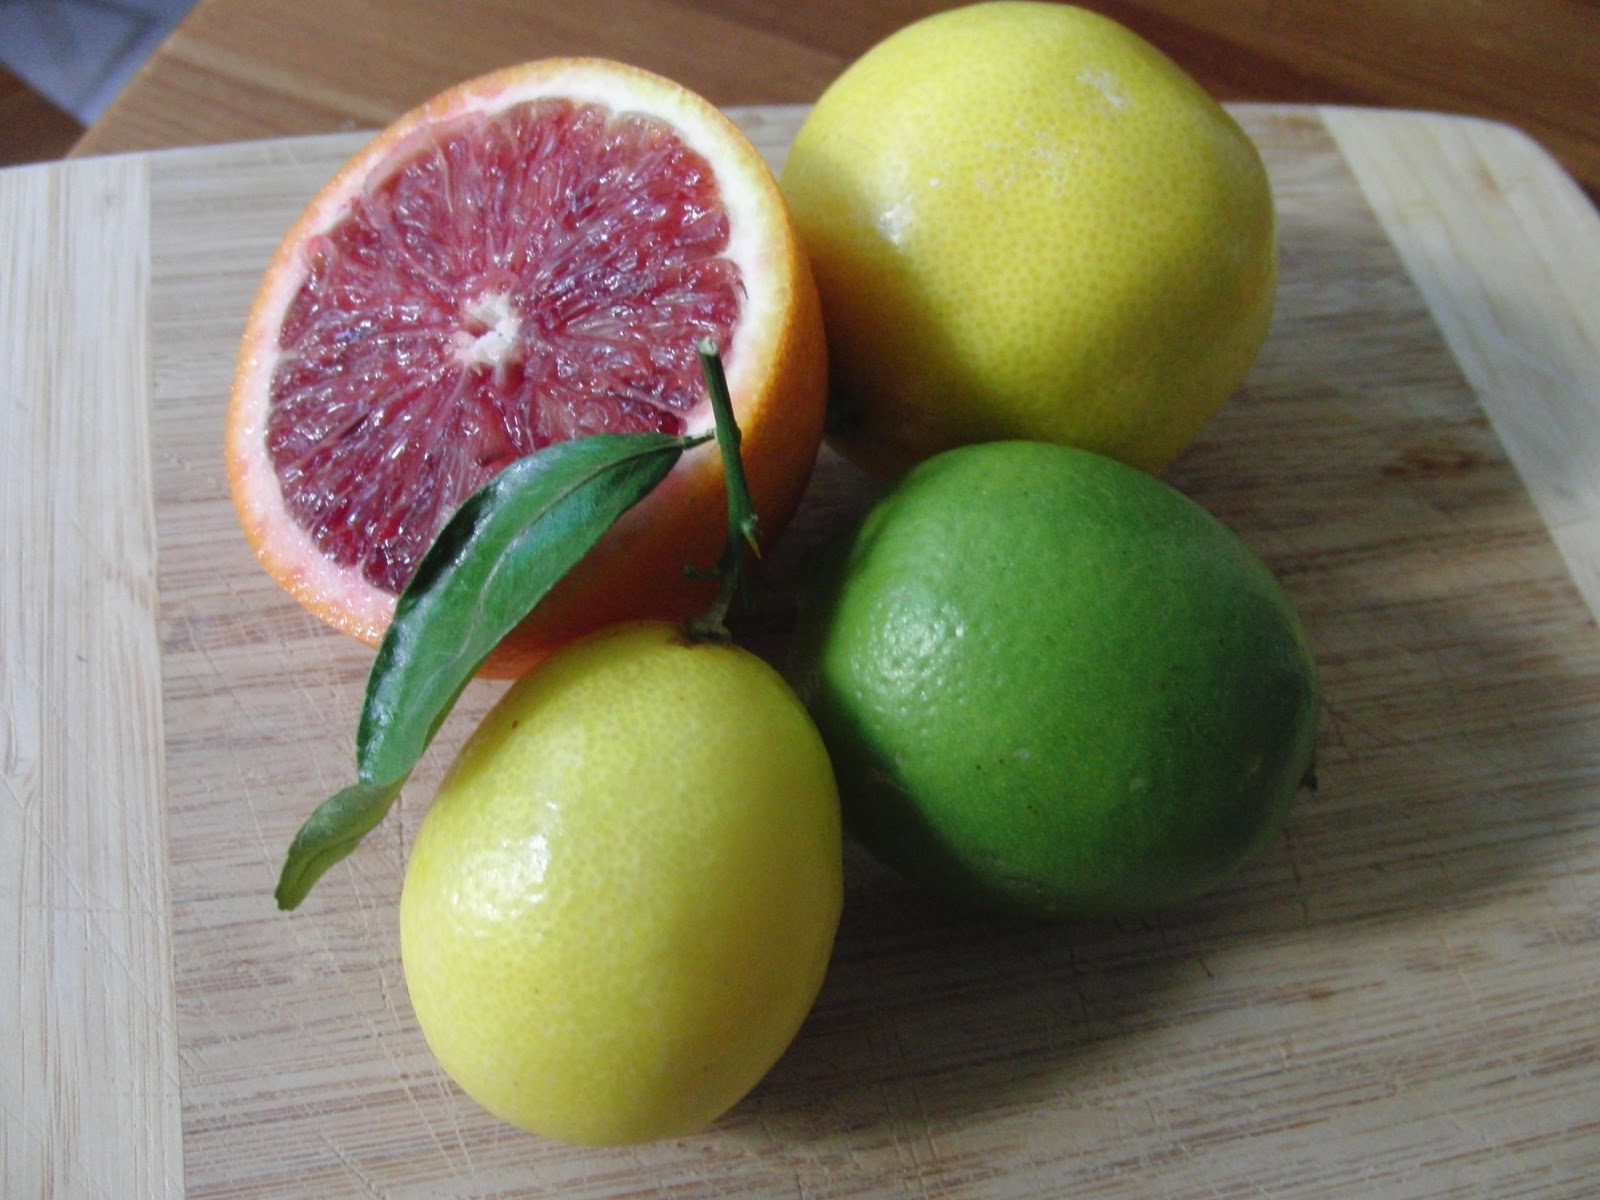
Limequats, mellow yellow grapefruits, sweet limes, manderinquats, pomelos and more..... Bi Rite Market always has the most beautiful and diverse range of seasonal fruits and vegetables.  I had my first watermelon radish at Bi Rite.  And right now there is a plethora of crazy citrus fruits I've never heard of before.  It's so exciting to bite into a sweet lime (which looks just like a lemon), expecting sour but tasting sweetness.  I've always been attracted to strange fruits/vegetables, especially hybrids, perhaps because of my own hybrid racial identity.  I think diversity is beautiful in all aspects of nature, from humans to plants.   I get kind of disturbed by the homogeneous rows of identical apples or oranges I see at Whole Foods Market, it just seems unnatural.  And they do not taste nearly as flavorful or potent as a locally grown blood orange from Bi Rite.  So go search your local farmer's markets for unique and perfectly imperfect produce.  Or demand some freaky and funky fruits and vegetables at your major grocery store!


Wednesday, February 23, 2011

Fried Chicken


Making fried chicken is quite an ordeal whether you make it gluten/sugar/dairy free or not.  So it better be worth it.  And trust me, this fried chicken was!  I invited a bunch of my dearest friends over for a feast of chicken and waffles.  I used Arrowhead Mill's gluten free pancake/waffle mix, and replaced the eggs with bananas for my vegan friends, which made them sweet and chewy.  The fried chicken turned out crispy and flavorful - I couldn't fry them fast enough before my friends ate them up! I based it off my dad's amazing fried chicken recipe. Although there are a lot of steps, and you have to deal with hot oil, and end up with a ton of greasy dishes, making gluten/sugar/dairy free fried chicken is so much fun!

Ingredients
  • 10 or so chicken thighs, drumsticks, and breasts
  • 3 eggs
  • 1 cup of coconut milk
  • 1/2 cup of seltzer
  • 6 cloves of garlic
  • 4 lemons
  • 1-2 cups of corn flour
  • 1-2 cups of rice flour
  • 1/2 cup of tapioca starch
  • 2 tablespoons each of salt, pepper, cayenne, garlic powder or other spices you like.
  • 1-2 large bottles of canola oil
  • Food thermometer is also helpful!
Directions
  1. Unwrap the chicken meat and lay on paper towels to dry.
  2. In a baking pan mix together the eggs, milk and seltzer to make the wet batter for the chicken.
  3. Mince 6 or so cloves of garlic and mix into the wet batter.
  4. Zest 2 of the lemons and put into the wet batter.
  5. Squeeze the juice out of those 2 lemons into the wet batter.
  6. Add one tablespoon each of the salt, pepper and cayenne into the wet batter.
  7. Pat dry the chicken pieces and let chicken marinate in the wet batter for at least 15 minutes.
  8. Fill a large and deep pot with oil.  Use a cooking thermometer to make sure the oil never gets above 350 degrees F.
  9. In another baking pan mix together the corn, rice, and tapioca flours. 
  10. Add the lemon zest of the other 2 lemons into the dry mix.
  11. Add the rest of the salt, pepper and cayenne into the dry mix.
  12. Once the oil is at 350 degrees, take 2-3 pieces of chicken out of the wet batter and coat them in the dry batter and slowly lower them into the hot oil.
  13. It takes about 10 minutes until each piece is cooked through.  
  14. When the chicken looks golden, carefully take out each piece of chicken from the pot and place on a tray covered in paper towels. 
  15. Repeat until all chicken is battered and fried!
  16. Serve with Arrowhead Mills waffles, or cornbread made from Pamela's gluten free mix!
PS:  You can also bake the chicken instead of frying it, at about 450 degrees for 40 minutes (flip over half way through.)  The baked fried chicken turns out juicy and tasty- and is definitely healthier if that's what you're going for!


Monday, February 14, 2011

Happy Birthday, Happy Tummy!


Everyone you know will love this cake: bitter sweet chocolate sauce drizzled on top of a rich, moist, chocolaty cake.  My friends, Anita and Ravi, and I baked this delicious cake for our friend Sanjay's birthday a few weeks ago.  But I thought it would be timely to post a birthday cake recipe this week as this is the one year anniversary of Happy Tummy!  It has been pure pleasure to work on this blog each week, especially when I hear stories of how the blog has helped people with food sensitivities!  If you have any birthday wishes to send Happy Tummy, I sincerely encourage you to comment on my blog!     

Ingredients:
  • 1 cup of gluten free flour 
  • 1 cup of unsweetened cocoa powder
  • 1 tsp of baking soda
  • 1 tsp of baking powder
  • 1 tsp of xanthan gum
  • 1/2 tsp of salt
  • 1/2 cup of melted Earth Balance or coconut oil
  • 2 large eggs (or flax eggs)
  • 2/3 cup of maple syrup (you can use more if you like it sweet)
  • 1/3 cup of rice milk
  • 2 tsp of vanilla extract
Directions:
  1. Preheat the oven to 350 degrees Fahrenheit.
  2. In a large bowl mix together all the dry ingredients.  
  3. In a separate bowl, mix together all the wet ingredients.
  4. Combine wet ingredients into the large bowl of dry ingredients and mix well.
  5. Pour batter into a greased and lightly floured 8 inch pan.
  6. Bake in the oven for about 30 minutes, until a knife comes out clean from the center.  
  7. Let the cake cool on a rack for 15 minutes or so.
For chocolate sauce:
  1. In a double boiler, melt one 8 ounce bar of 100% unsweetened chocolate.
  2. Once the chocolate is melted, stir in about 1 tablespoon of maple syrup or agave.  You can add more if you like it sweeter.
  3. If the sauce is too thick or sticky, add a tablespoon of rice milk and mix well.  
  4. Add a tsp of vanilla extract.
  5. Pour all over the cake and enjoy!

Wednesday, February 9, 2011

Crunchy Granola


Crunchy granola- why has it gotten such a bad rap?  I love my granola crunchy, packed full of nuts, with just a touch of sweetness.  Udi's granola is my favorite gluten/sugar/dairy free brand, but I love making my own granola because you can put whatever you want in it.  This time I just threw in all the extra ingredients I had in my pantry- leftover coconut flakes, sunflower seeds I was never going to use, and I ground up some raw almonds to make my own almond flour.  You can also purchase almond flour at the store.  If you are gluten intolerant- make sure you buy gluten free oats- Bob's Red Mill has them.  Please feel free to throw in dried fruit or other delicious ingredients you love!

Ingredients
  • 3 cups of gluten free oats
  • 3/4 cup of almond flour
  • 1 cup of sliced almonds
  • 1/2 cup of cashews, or macadamia nuts or walnuts.....
  • 1 cup of sunflower seeds
  • 1/2 cup of coconut flakes or shreds 
  • 1/4 cup of ground flax seed
  • 1 tablespoon cinnamon
  • 1 tsp of nutmeg
  • 1 tsp of salt
  • 2 tablespoons of oil (canola, grapeseed...)
  • 1/2 cup of maple syrup or honey or agave (diluted with a tablespoon of hot water)
  • 1 tsp of vanilla extract  
Directions
  1. Preheat oven to 350 degrees F.
  2. Spread a layer of oats onto two baking pans and bake for about 8-10 minutes.
  3. Meanwhile, in a small bowl mix together the oil, maple syrup, water and vanilla.
  4. Once oats are slightly toasted, remove from the oven, and pour them into a large bowl.
  5. Mix in all the dry ingredients, then add the bowl of wet ingredients.
  6. Mix well and place a thin layer of the granola onto the two baking pans.  
  7. Bake in the oven for about 30-35 minutes depending on how toasted you like it.  Remember that the granola will continue to bake and get harder after it's out of the oven, so always err on the under-baked side.  
  8. Enjoy with some rice milk or or soy yogurt!  

Saturday, January 29, 2011

Veggie Burritos


There is nothing more satisfying than chomping into a big burrito stuffed with all your favorite vegetables.  The other night my roommate and I made the most mouth watering burritos using Food for Life brown rice tortillas, and filling them with beans and rice, kale, sweet potatoes, mushrooms and avocado.  These brown rice tortillas are so versatile-I use them for just about everything, but you must steam the tortillas for a few minutes so they are flexible enough to wrap up the burrito.  I love burritos, because you can put anything in them that you wish.  Try grilling some chicken or fish, or putting in some sauteed peppers and spinach or corn and tomatoes- whatever your heart desires!  

Ingredients
  • 1 yellow onion, chopped
  • 2-4 cloves of garlic, minced
  • 2 tablespoons of Mexican seasoning (read the ingredients label to make sure it is safe for you)
  • 1 container of mushrooms, sliced
  • 1 can of cooked beans- black or pinto are best
  • 2 cups of steamed rice
  • 1 bunch of kale, trimmed
  • 1 large sweet potato, chopped into bite size pieces
  • 1 ripe avocado
  • half a lime
  • Food for Life brown rice tortillas
  • (Shredded soy/rice/almond cheese if you like)
Directions
  1. Saute the chopped onions in a pan with olive oil on medium heat.  Add sliced mushrooms after a few minutes.  Cook until both are soft and golden.
  2. In a pot saute the garlic and add the beans.  Cook on medium heat until beans are soft.
  3. In a bamboo steamer (or any steamer) steam the sweet potatoes for about 15 minutes, and steam the kale for about 8 minutes.
  4. Slice up the avocado into bite sized pieces and squeeze the lime on it.
  5. Once all fillings are ready, steam each brown rice tortilla in your bamboo steamer for about 5 minutes or less.  If you want to melt some cheese, sprinkle the grated cheese on top of the tortilla as it steams.
  6. Once the tortilla is soft, remove from the steamer and fill with any combination of ingredients.  
  7. Tightly roll up the burrito and enjoy with your favorite salsa!


Sunday, January 23, 2011

Pumpkin Muffins


For weeks I've been envisioning baking cornbread muffins with all the jars of cornmeal I thought I had stored up in my pantry.  But when I poked around my pantry shelves I found only corn flour and lot's of masa harina that I am saving to make tamales sometime soon.  Standing on a stool in my kitchen with a tub of gluten free flour in one hand and muffin liners in the other, I was stopped in my tracks not knowing what to do.  All the momentum drained out of me and I sat down to re-access my options.  This was a familiar situation.  Lately I keep making big plans like traveling to Japan, but then out of nowhere an obstacle shoves itself right in my way.  As in these situations, I knew that I had to let go of my cornbread dreams and be creative with what I did have in my pantry.  I looked around and saw a can of pumpkin that I was saving to make a pumpkin pie that never happened and I quickly mastered a new plan: pumpkin muffins.  I even had walnuts and and sugar/dairy free chocolate chips all ready to be used in this recipe.  Everything I needed I already had- what a thought.  If only I could apply this to the rest of my life.  These pumpkin muffins came out very soft and chewy and sweet.  For some reason they deflated a little when they came out of the oven.  But they still tasted like a delicious pumpkin pie with all the spices and maple syrup, yum....cornbread can wait.

Ingredients
  • 1 and 1/2 cups of gluten free flour (I like a mix of brown rice flour, sorghum flour, buckwheat flour)
  • 1/2 cup of tapioca flour 
  • 1 tsp baking soda
  • 1/2 tsp of xanthan gum
  • 1 tsp of cinnamon
  • 1/2 tsp of ginger
  • 1/4 tsp of nutmeg
  • 1/4 tsp of ground cloves
  • 3/4 cup of maple syrup (or agave, or other sweetener)
  • 1/4 cup of canola or grape seed oil
  • 2 large eggs (or egg replacer)
  • 1 tsp of vanilla extract
  • 1 can of cooked pumpkin
  • 1/2 cup of soy/rice/almond milk with a tablespoon of orange juice
  • 1/2 cup of walnuts
  • optional:  half a cup of w/s/d free chocolate or carob chips 
Directions
  1. Preheat oven to 400 degrees Fahrenheit and grease a 12 cup muffin pan.
  2. In a large bowl mix together all the dry ingredients (minus the walnuts or chocolate chips.)
  3. In another bowl mix together all the wet ingredients.
  4. Combine the wet and dry ingredients into one bowl.  Add the walnuts and chocolate chips.
  5. Fill each muffin cup generously.
  6. Bake in the oven for about 30-35 minutes or until a toothpick comes out clean from the center of a muffin.
  7. Enjoy!
PS:  Below are the only chocolate/carob chips I have found that come close to being wheat/sugar.dairy free.  They are sweetened with barely malt so they are NOT gluten free, but are dairy and sugar free.  I am working on making my own wheat/sugar/dairy free chocolate chips, stay tuned....